Tutorial: connect to a Wi-Fi access point
Warning
This tutorial is only about Qubes 4.3
Right after installing Qubes OS, connecting to a Wi-Fi access point might be the first thing you want to do. Even if you don’t want to browse the internet, this would allow you to update the system.
Note
If you use another type of connection (i.e.: ethernet), you can still follow this tutorial.
First Qubes OS boot
In order to start, let’s power on the device where Qubes OS is installed. A succession of screens are presented to you:
the firmware of your computer might use the BIOS or the UEFI), a software independent from Qubes OS. How the screen renders is dependent on your hardware.
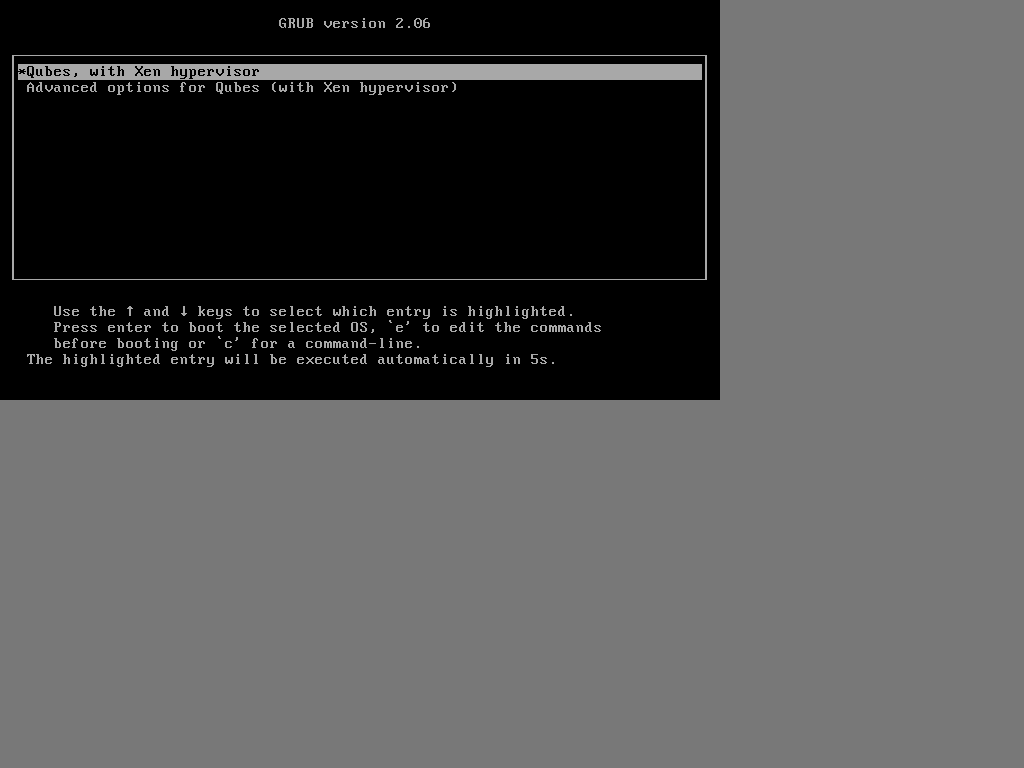
then another screen provides a list of options. The first one is Qubes, with Xen hypervisor. If you do nothing, this option is automatically selected. This software is a bootloader and that specific bootloader is called GRUB:
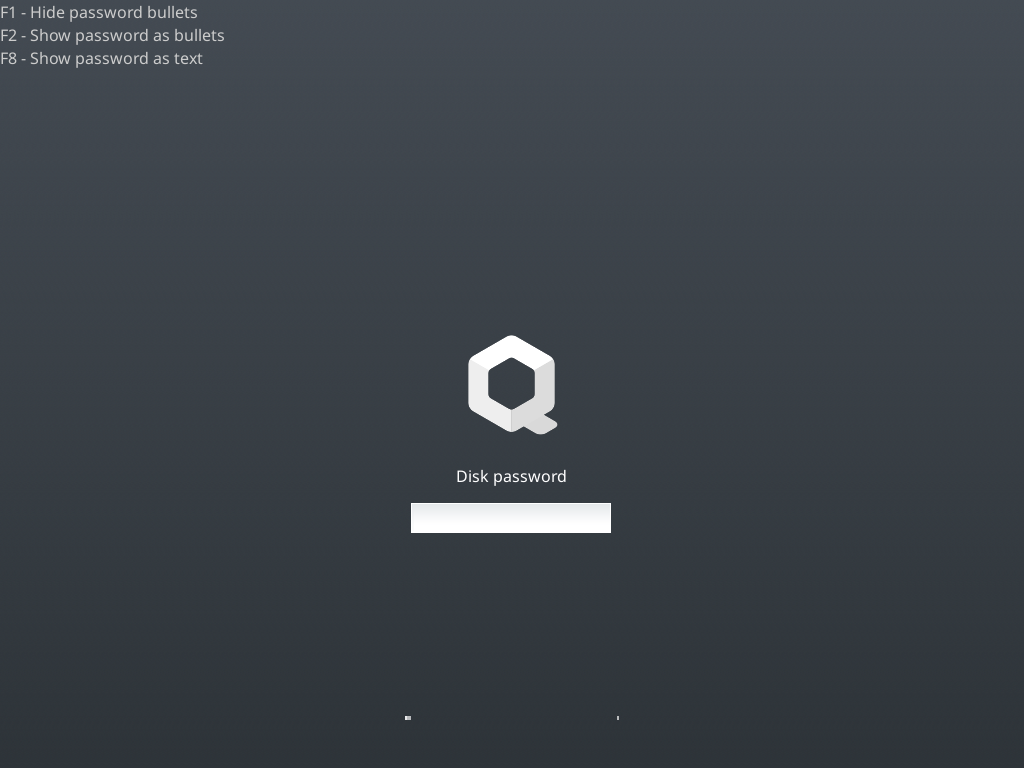
A prompt appears and you must provide the passphrase that was used to encrypt your drive during the installation. Without that, it is impossible for the system to decrypt the drive, and thus, read your data. When you access this screen, Qubes OS is already running.
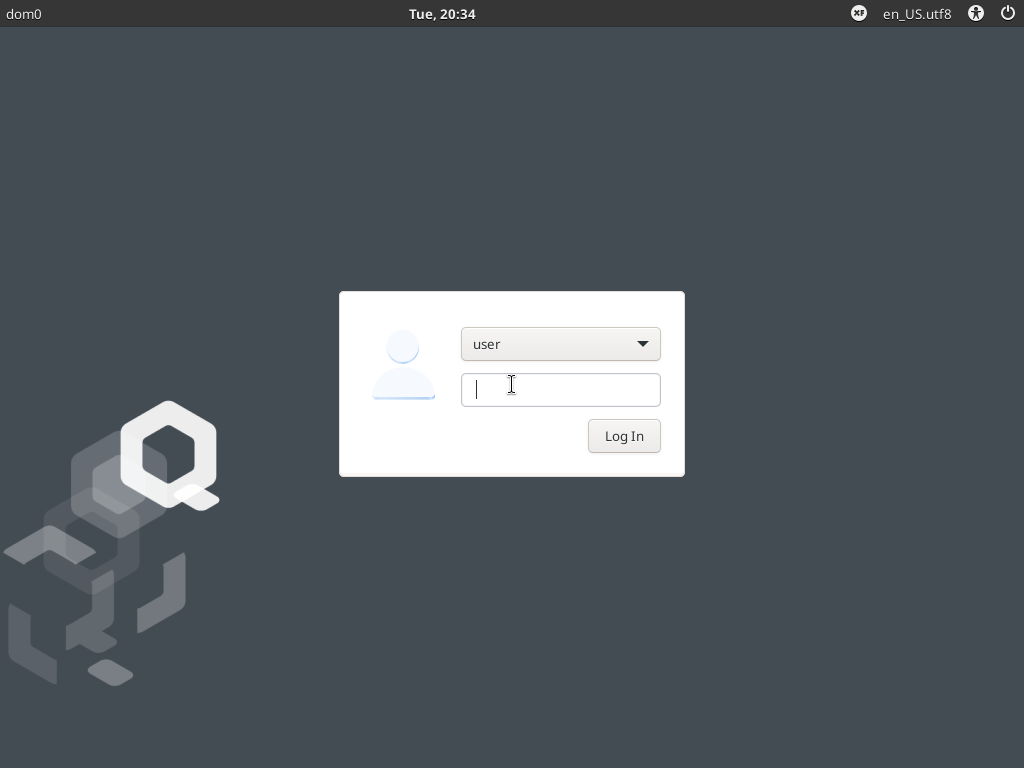
After some seconds, you can see a login screen, with your username, asking you to type your user password. That will allow you to start your user session.
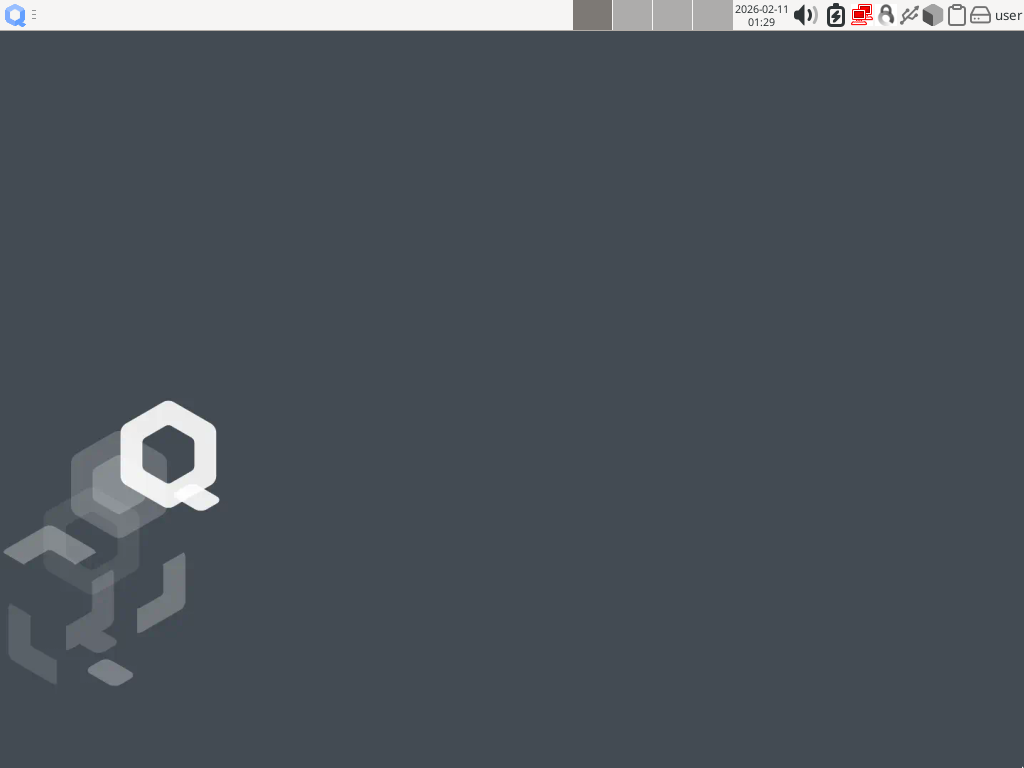
Your desktop is starting. Some notifications might pop up, you might need to wait a bit but in the end, you can start to use Qubes OS! You get a screen like the following:
You don’t have to remember the name of the different programs or even the order of the steps. Just be aware of the process. Qubes OS is a collection of tools, built upon existing softwares, like GRUB. GRUB is the tool that will load another software called Xen. Xen does not provide any graphical output as “Xen”, so we will not learn more about it now.
Connect to a Wi-Fi access point
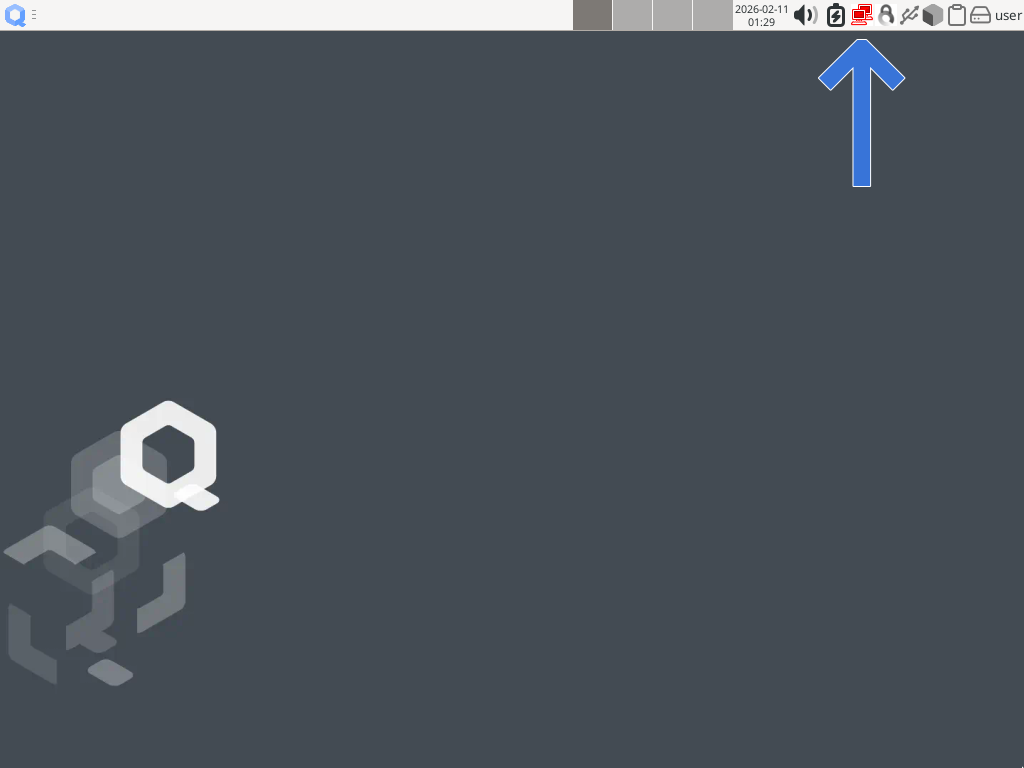
After logging in, the first screen you get displays a full-width panel at the top of the screen. On the right, you can see a group of icons, one of them being red and displaying two superposed screens. Click that icon.
A menu will drop down: notice that it has red borders. You should be able to select your access point in the list of the available access points:
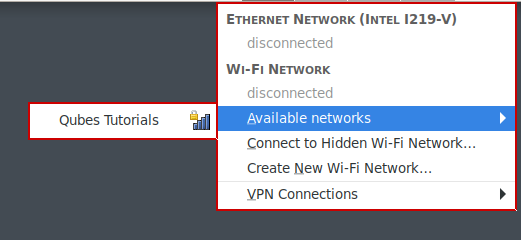
Note
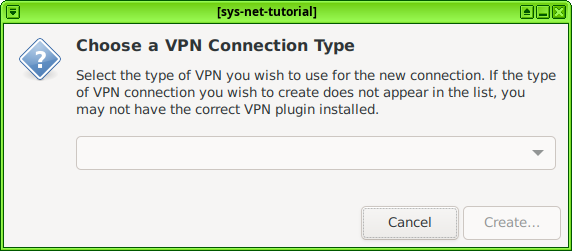
If you don’t have a access point to connect to, or no Wi-Fi controller, you can use Create New Wi-Fi Network or VPN Connections to see the next window, then select Cancel.
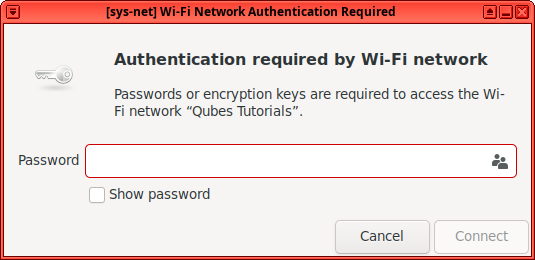
A window opens, notice that the decoration of the window is red again. The title starts with [sys-net]. You can enter your Wi-Fi password and connect:
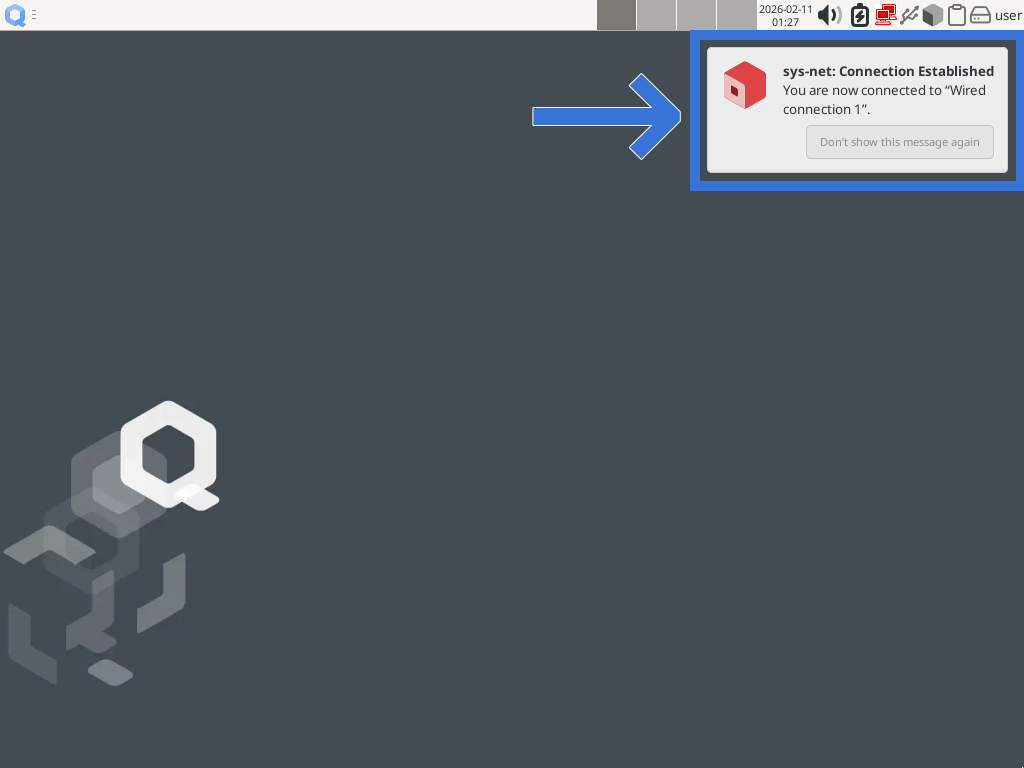
A notification tells you that you are now connected. This time, notice that the borders of the notification are not red. The notification title is sys-net: Connection established. And you can see an icon, representing a red cube on the left.
By doing this simple action, we are already using some features of Qubes OS. The system is designed to isolate all the different pieces of software that usually run together. That means that instead of running the software managing the network along the rest of the system, this specific task is isolated in a compartment that we call a “qube” (with the letter “q” in lowercase).
By default, sys-net (“sys” for system and “net” for “network”) is the qube managing the network. It has a red label: this is an arbitrary color. You can choose any color you want but the convention is to consider that red means danger. In the case of sys-net, this qube is directly facing the outside world so, we consider that it could be compromised.
See the other existing qubes
To isolate different kinds of software, we need to use different qubes (compartments). Most of the time you will have several qubes running at the same time, you will start some other qubes, stop another, etc.
One convenient but limited tool to do that is the Qubes Domains widget. Here, the term “domain” has quite the same meaning as the term “qube”, which we prefer to use.
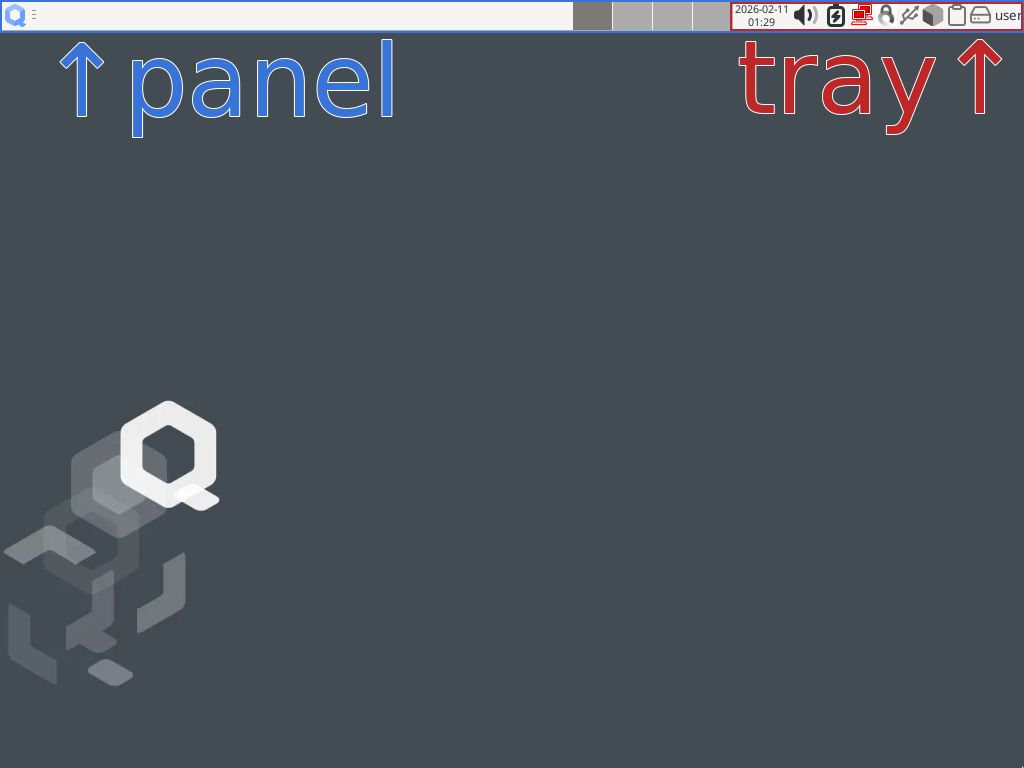
This tool is accessible from the panel, at the top of the screen. This panel has several parts and the one on the right is called the tray.
The panel and its components are managed by Xfce Panel which is part of the default desktop environment used by Qubes OS: Xfce. That is another example of Qubes OS reusing existing softwares while focusing on isolation.
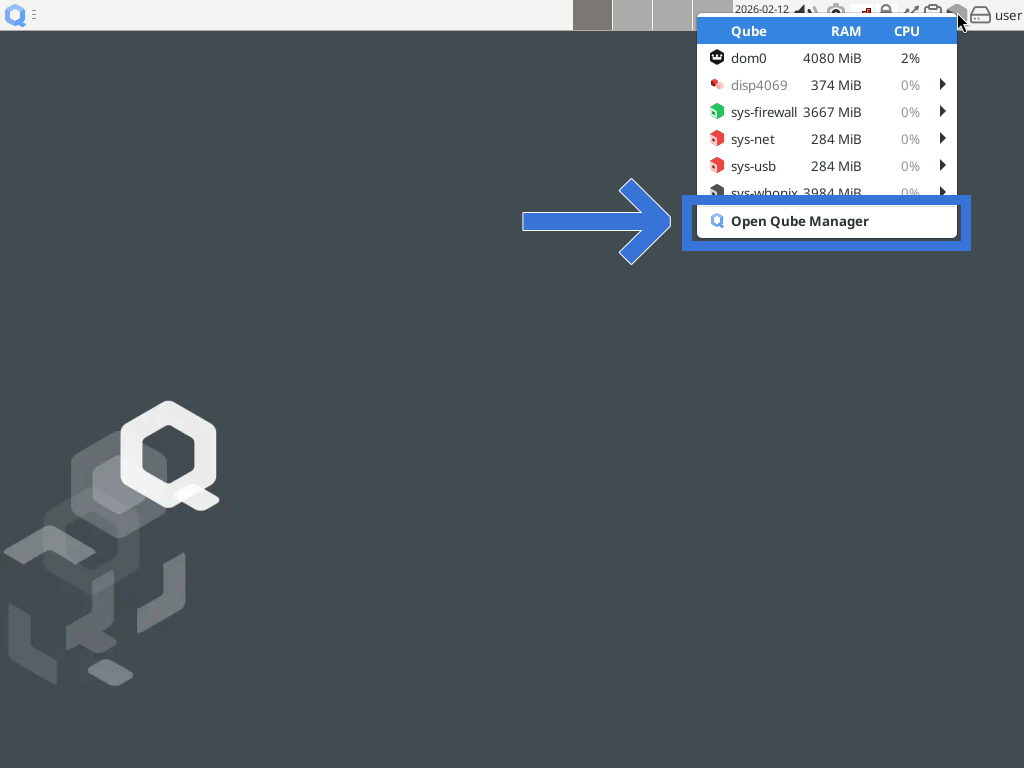
You can find Qubes Domains widget in the tray, by clicking on its icon (a gray cube):

Qubes Domains widget icon: a gray cube
To see the currently running qubes, click the Qubes Domains widget icon, next to the red icon we used to connect to the access point.

A drop-down menu lists currently running qubes:
dom0, with a white crown over a black hexagon icon
sys-firewall with a green cube icon
sys-net with that red icon
sys-usb with the same icon
sys-whonix with a black icon
This menu does not have any colored border. It is because it is generated by another qube, called dom0 (“dom” for “domain”). This qube is special and has two functions:
to administer other qubes: dom0 is an admin qube
to display all the windows of every qube as if they weren’t isolated: dom0 is also a GUI domain (here, “domain” means “qube”).
As a GUI domain, dom0 is responsible for painting the colored border around each window of each qube. It does not paint any colored border around its own windows, that is why the notification does not have a red border.
Now, click Open Qube Manager at the end of the drop-down menu.
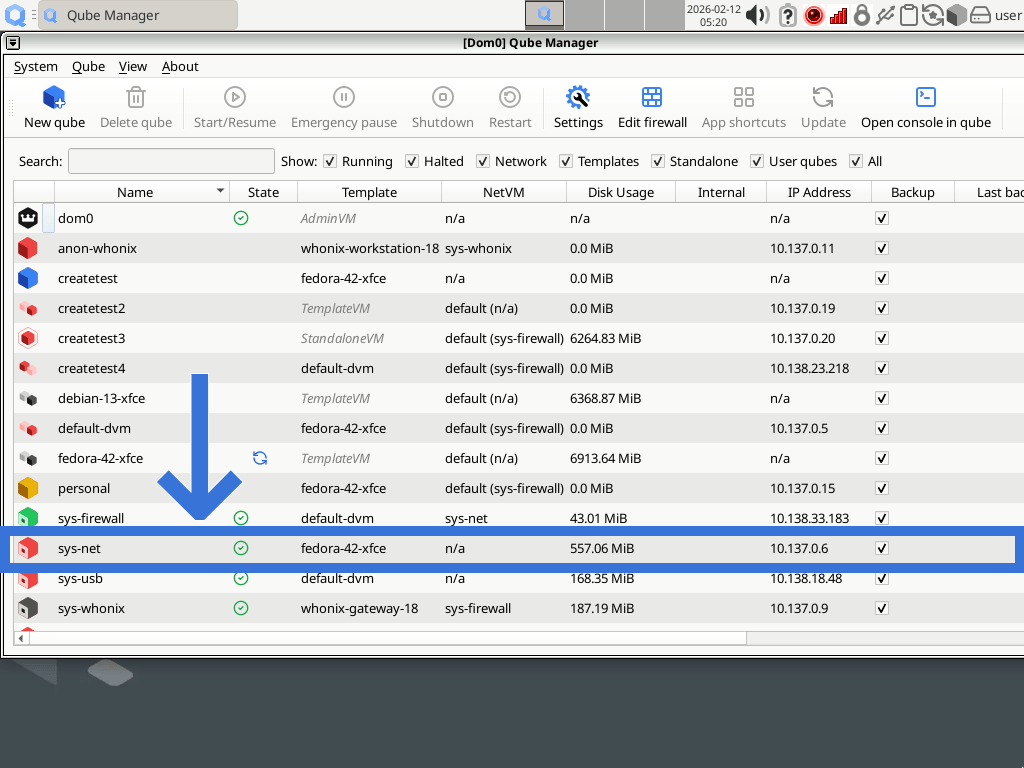
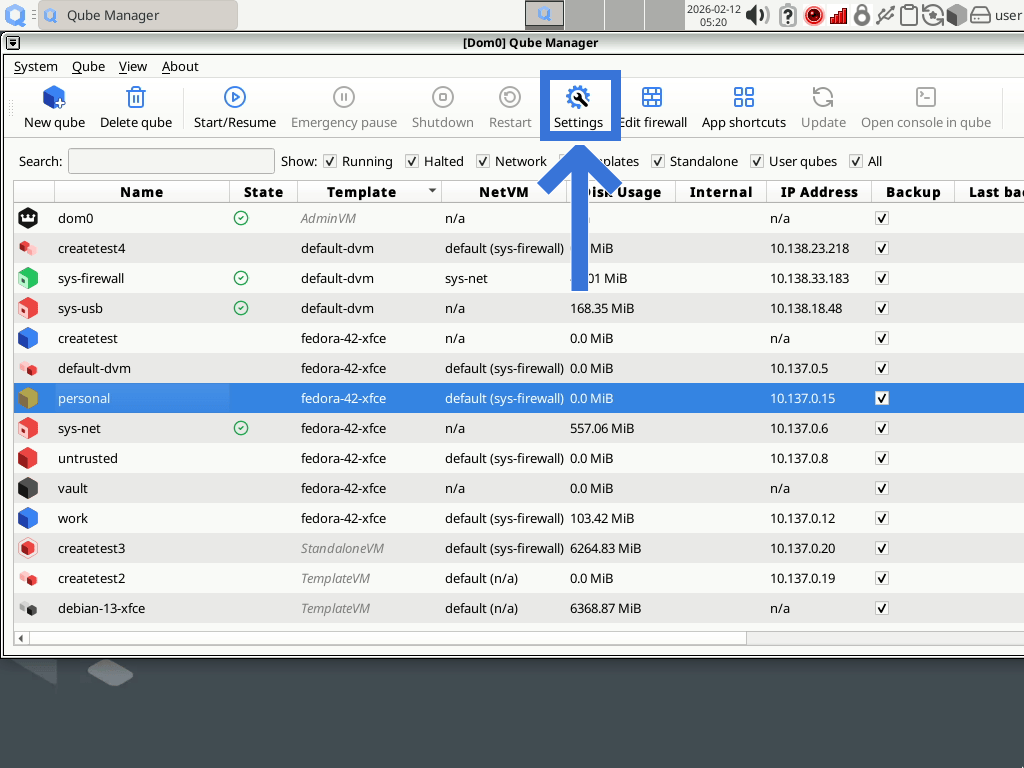
The program Qube Manager lists all the existing qubes, not only the running ones. There is much information here, we will ignore most of it for now.
Create a new sys-net-tutorial qube
To get a better understanding of the isolation provided by Qubes OS, we will try to create a new qube like sys-net (and we will fail, on purpose!). This qube will be named sys-net-tutorial.
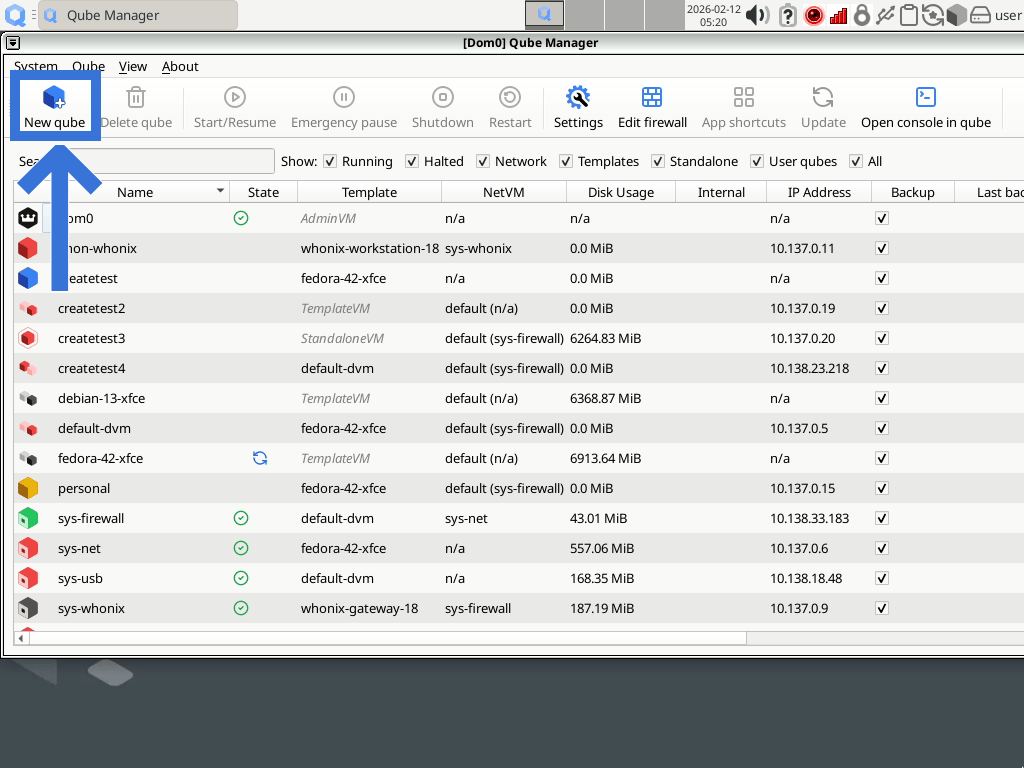
Open Create New Qube
We can use Qube Manager to create a new qube, with one of those two methods:
In the menu at the top of the window, click
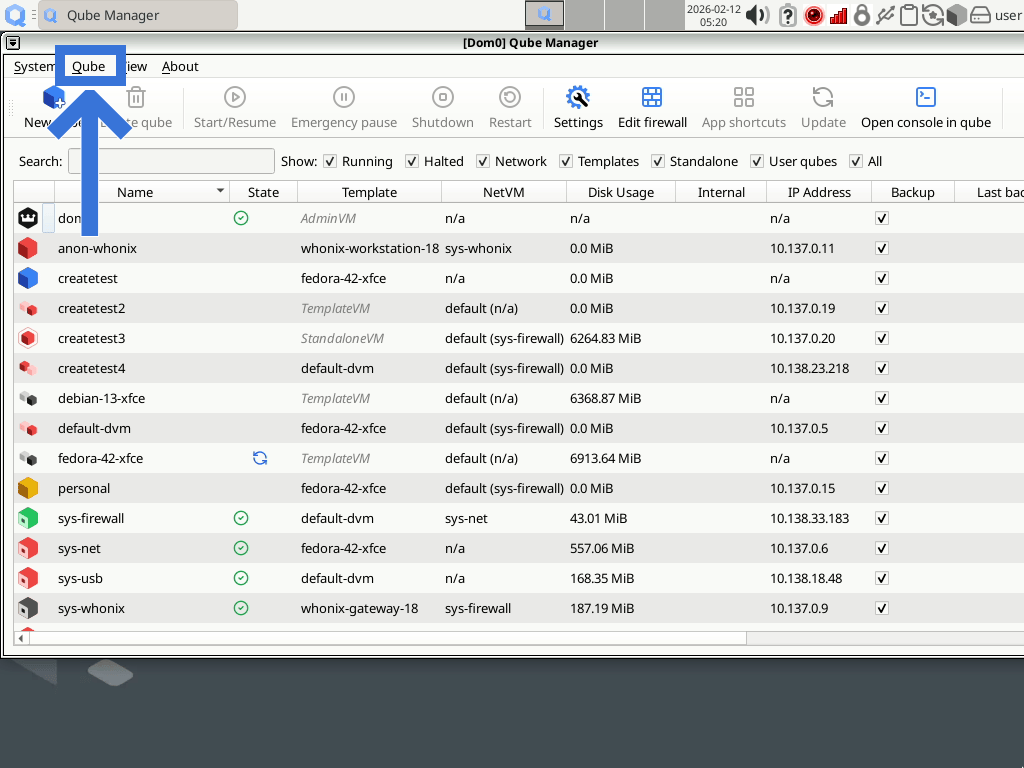
Or just click the New qube button
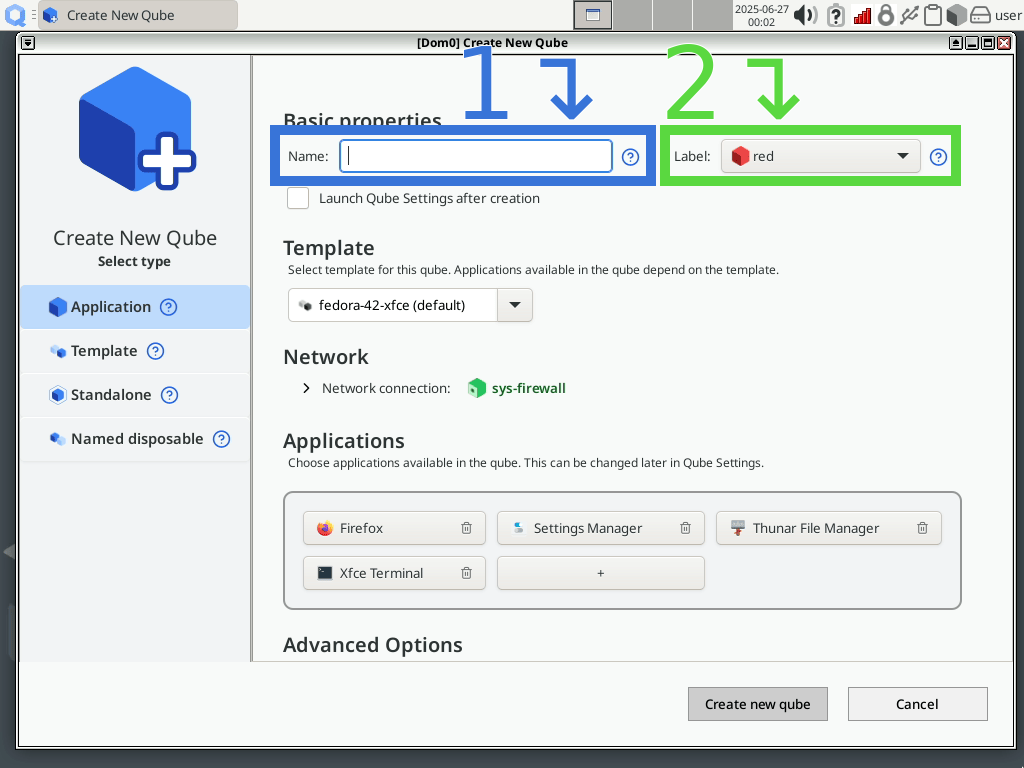
A new windows open up. Notice that the displayed name is [Dom0] Create New Qube. You are using the two functions of dom0: the GUI domain is displaying the window, while the admin qube is used to manage other qubes.
Change the name and the label of the new qube
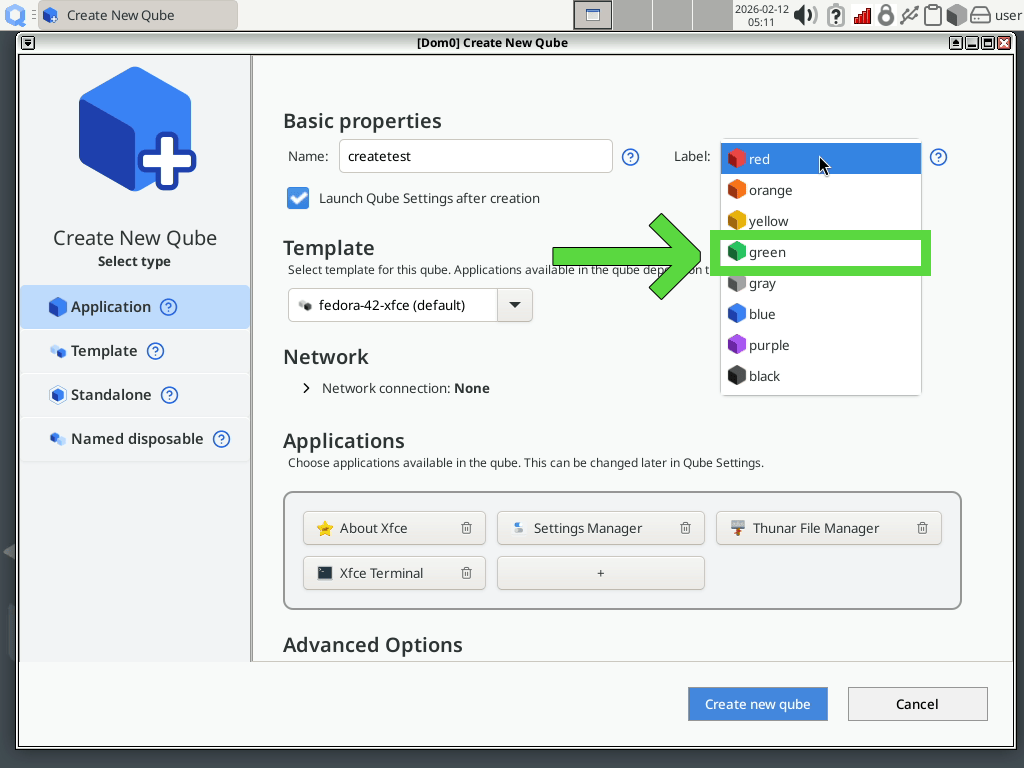
Let’s choose a name for this new qube, like sys-net-tutorial. Then click the label drop-down menu:
For the purpose of this tutorial, we will choose the green label.
Note
From Getting started:
Most Qubes users associate red with what’s untrusted and dangerous (like a red stop light signalling danger), green with what’s safe and trusted, and yellow and orange with things in-between. This color scheme also includes blue and black, commonly interpreted as indicating progressively more trusted domains than green, with black being ultimately trusted. However, color and associated meanings are entirely up to you. The system itself does not treat the colors differently - they’re all equally safe on their own. If you create two identical qubes — black and red, say — they’ll be the same until you start using them differently. Feel free to use the colors in the way that best meets your needs. For example, you might decide to use three or four qubes for work activities and give them all the same color — or all different colors depending on the nature of the task they are used for.
Change the network properties
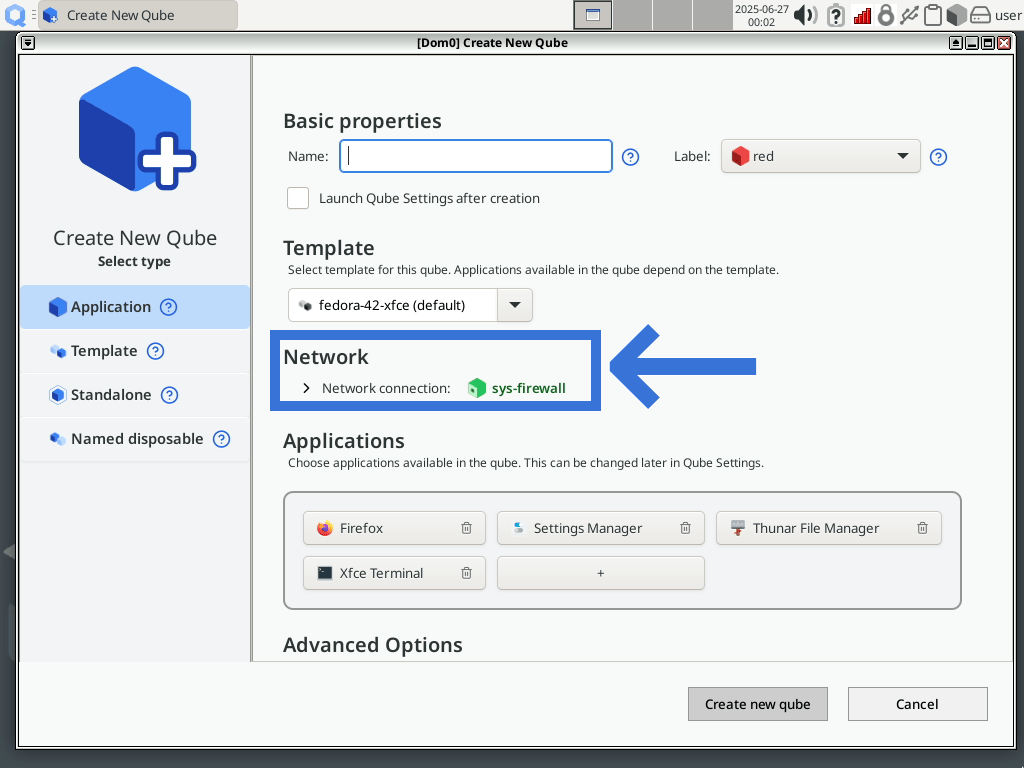
In the Network section, network connection is already set, pointing to a qube called sys-firewall. sys-firewall is the default “net qube”. A net qube is a qube whose role is to provide network to other qube. sys-net is not the default net qube because it is untrusted. sys-net is in direct interaction with the network stack. sys-firewall acts as a trusted proxy, that is why it is green, not red like sys-net.
But we are trying to create a new sys-net, and sys-net does not have any “net qube”, so we will remove that property. Click Network connection: sys-firewall to see the available options.
And select No network connection:
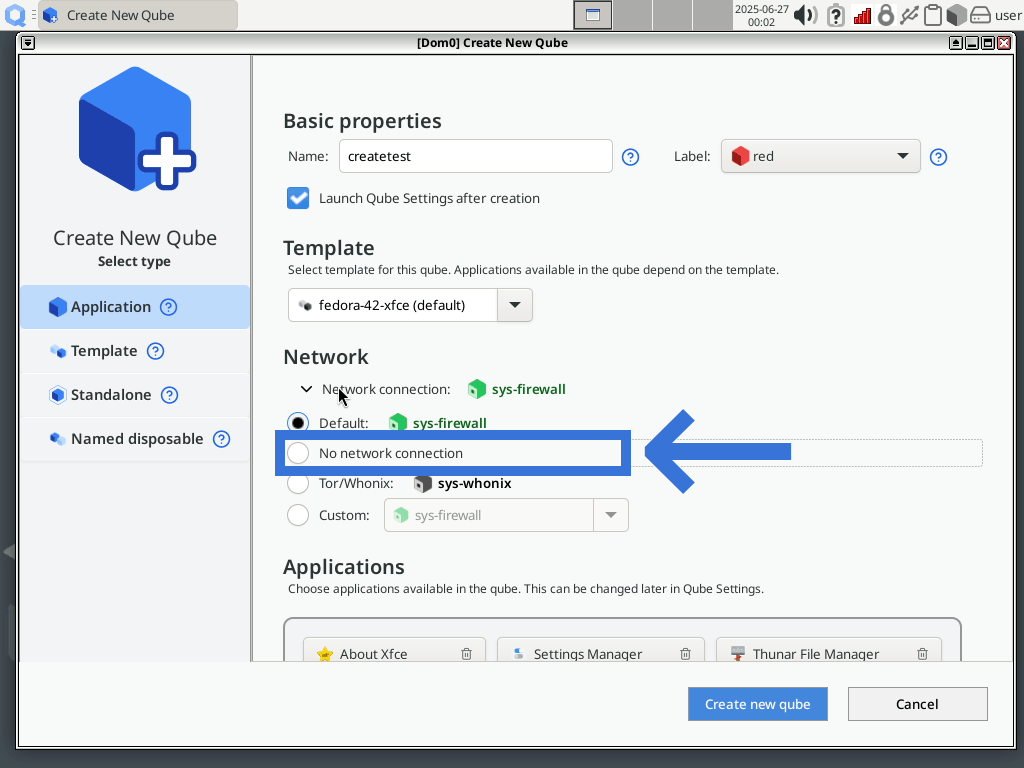
Now, you need to go to the Advanced Options section: click Show advanced settings and select Provides network to other qubes. This is the property that allows a qube to serves a net qube for other qubes.
Click Create new qube, wait for the confirmation pop-up to appear and you’re done! You have created your first qube!
Start the new sys-net-tutorial qube
It is time to reopen Qube Manager and check that your qube is listed here. You can now start your qube, it is like starting another computer.
Hint
Before reading how to start the qube, try to find by yourself one of the three methods available in Qube Manager. Two of them are quite like the ones used to create a new qube.
So, you can either:
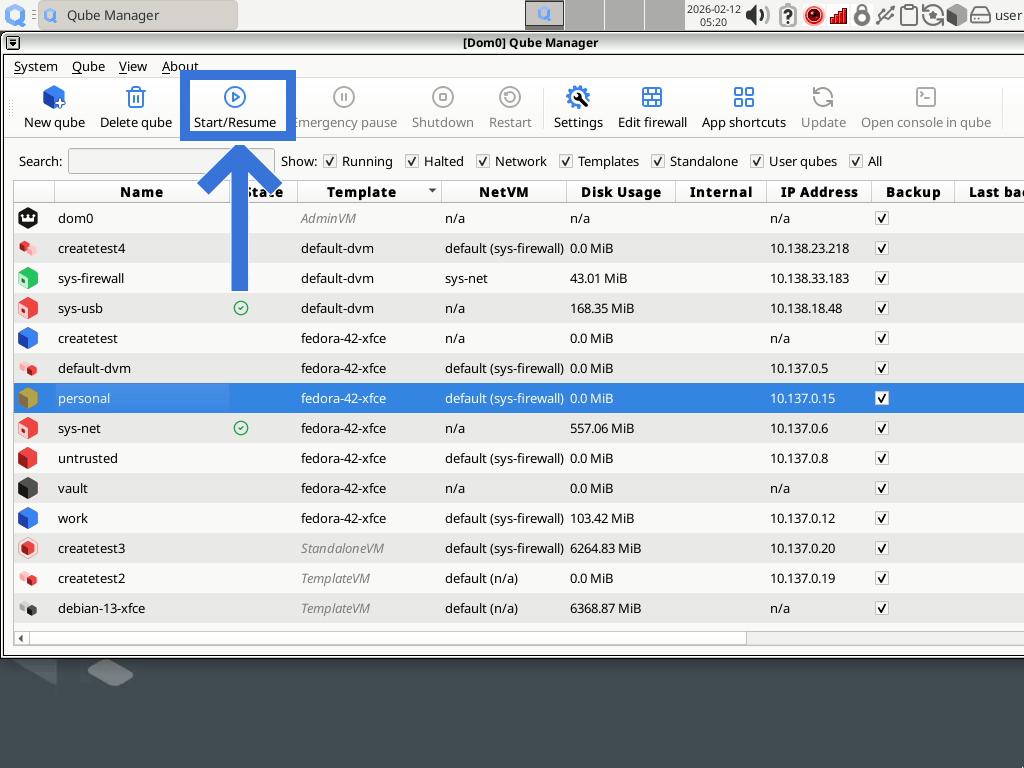
click the line corresponding to sys-net-tutorial and then:
click the Start/Resume button:
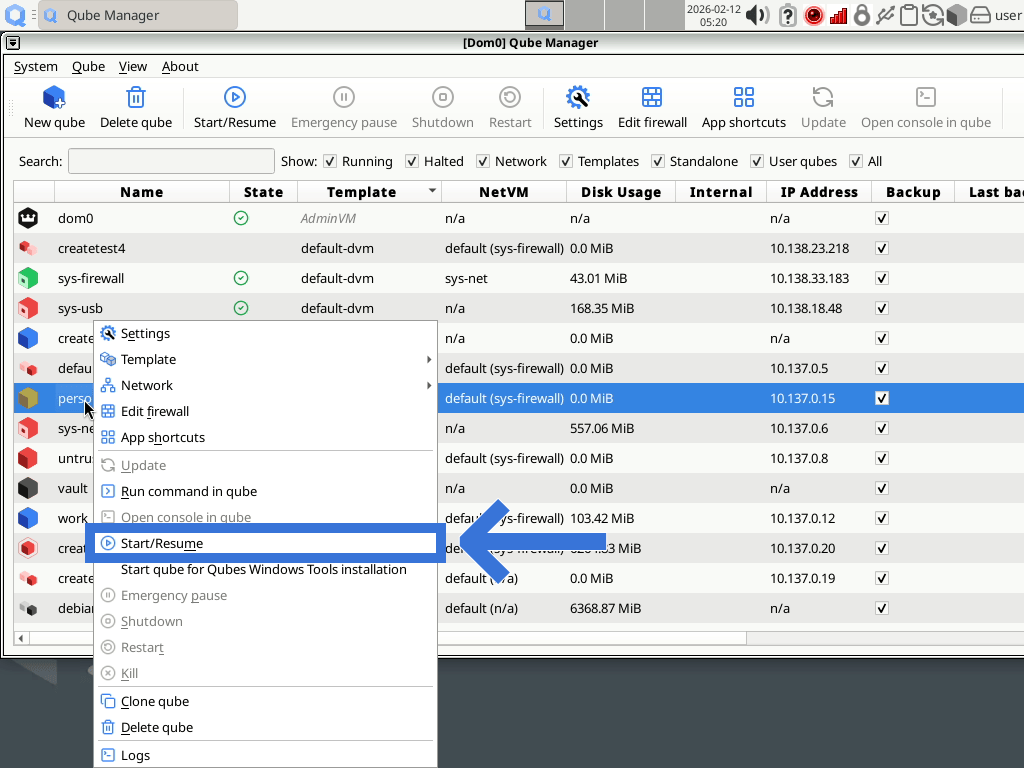
or go to the main menu and select:
you can also right click the line corresponding to sys-net-tutorial and select Start/Resume
Check that sys-net-tutorial qube is running
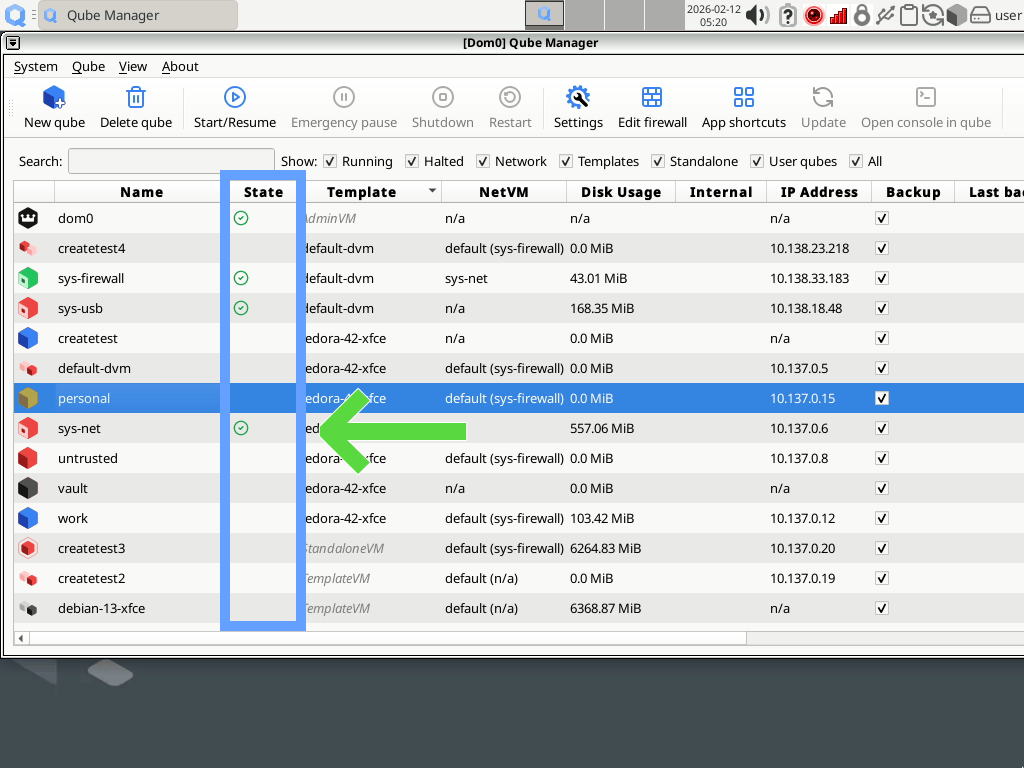
To check that the sys-net-tutorial is running, look for the appropriate line in Qube Manager. The State column should show two different state:
 an orange icon, indicating Transient state on hover
 a green icon, indicating Running state on hover
If Qube Manager is not opened, you can quickly check the running qubes using Qubes Domains widget:
Why is sys-net-tutorial not working like sys-net?
You might have noted that a new green icon, like the red one used by sys-net is now present in the tray. We have a nice imitation of the sys-net qube but, we are about to fail our goal! Click the green icon and try to connect to your Wi-Fi access point, just as we did with sys-net in the first place: you cannot! The widget displays a message telling you No network devices available. All you can do is click . You get a useless window:
But note that the window borders are now green and that the title starts with [sys-net-tutorial].
Why is sys-net successfully working while our own sys-net-tutorial cannot find any network device? Remember, we saw that sys-net, as a qube, is an isolated compartment. This specific qube handles the network software but also the network hardware. Any qube we create does not have direct access to the network hardware, so that is why our sys-net-tutorial is useless.
Open the settings of sys-net
You can check that in the settings of the two qubes. Using Qube Manager, we have three possible methods, quite like the ones we already saw while starting the qube.
Hint
Before reading how to open the settings of a qube, try to find by yourself one of the three methods available in Qube Manager.
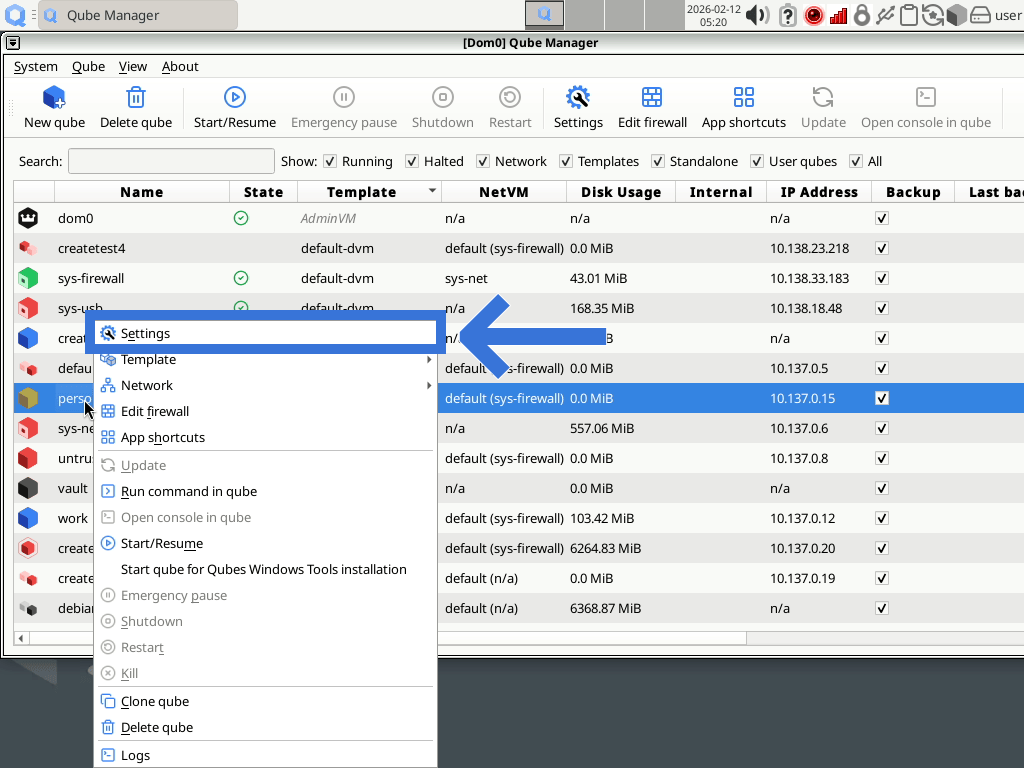
We will access the settings of sys-net by using any of the following methods:
click the line corresponding to sys-net and then:
click the Settings button:
or go to the main menu and select:
you can also right click the line corresponding to sys-net and select Settings
Check the devices connected to sys-net qube
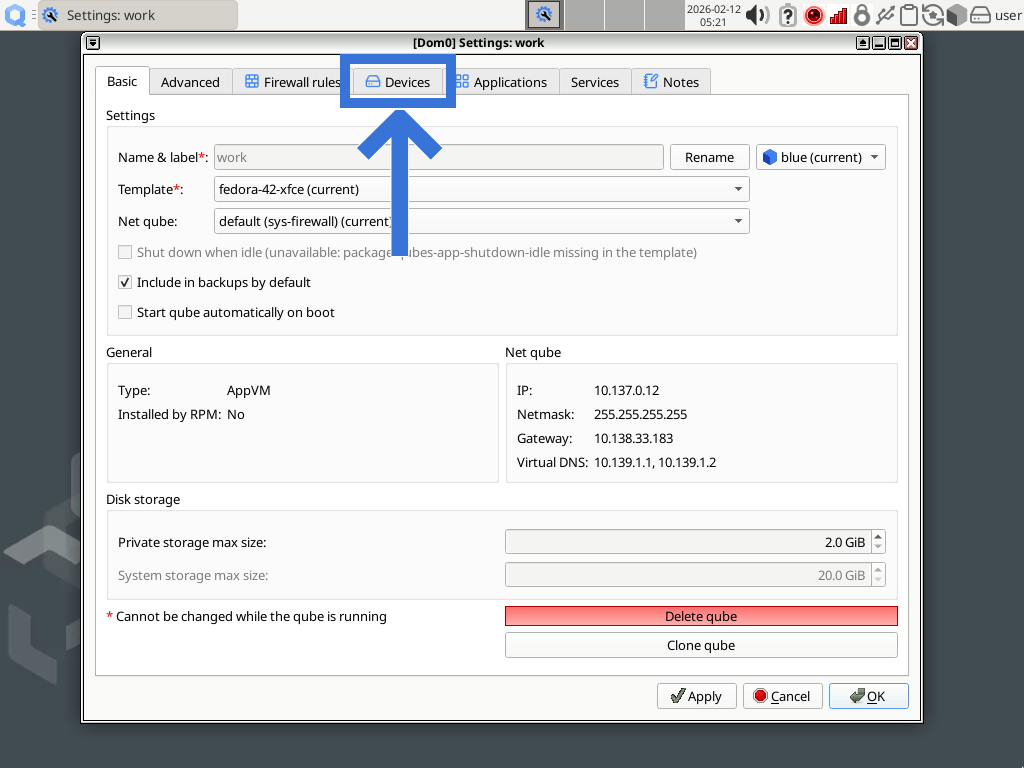
A new window opens: the title is [Dom0] Settings: sys-net because it is up to the admin qube to manage the settings of a qube. If a qube could manage its own settings that would mean that a compromised qube could change its name, label, network access, and so on. Go to the Devices tab:
You will see two lists. The first one, on the left, presents all the Available devices. Those devices correspond to the hardware of your computer so what is listed on your screen might be different from the following screenshot:
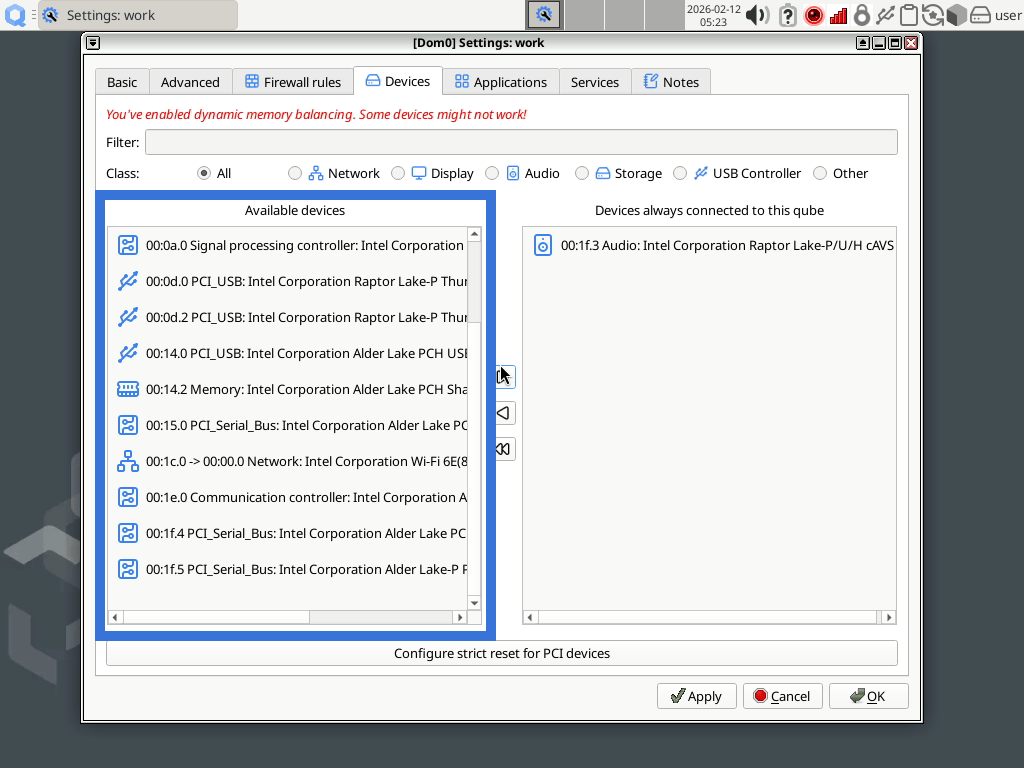
Note that each device class has a distinctive icon. You can filter the devices to see only the one of the Network class:
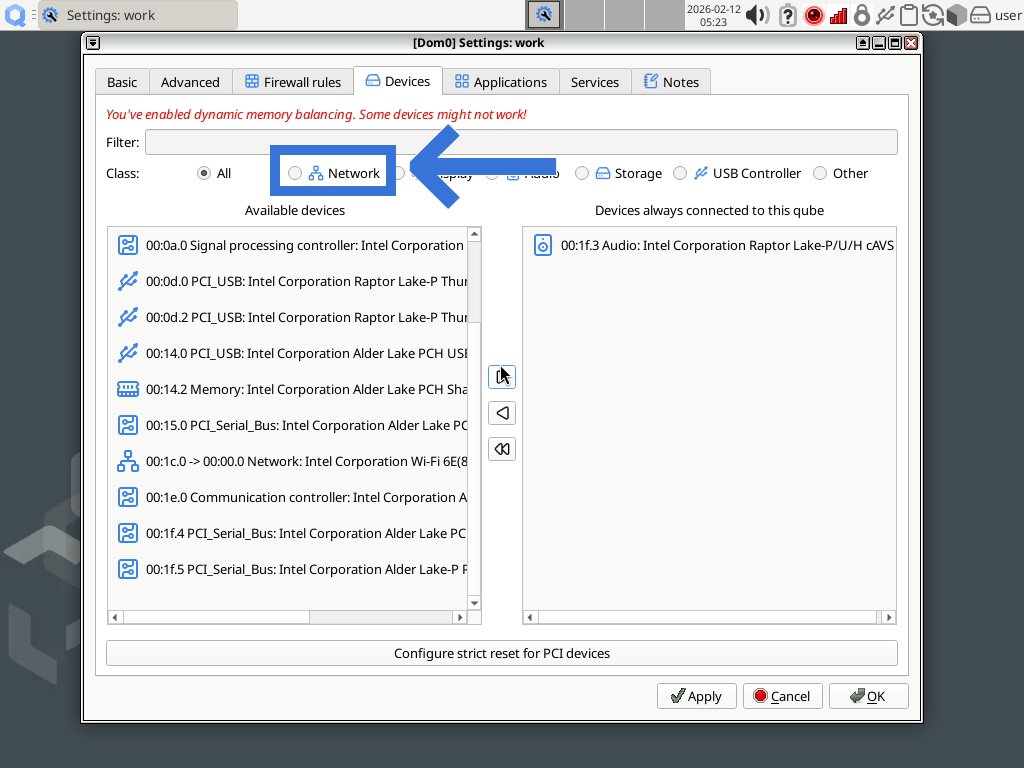
You should see some Devices always connected to this qube with the network class:
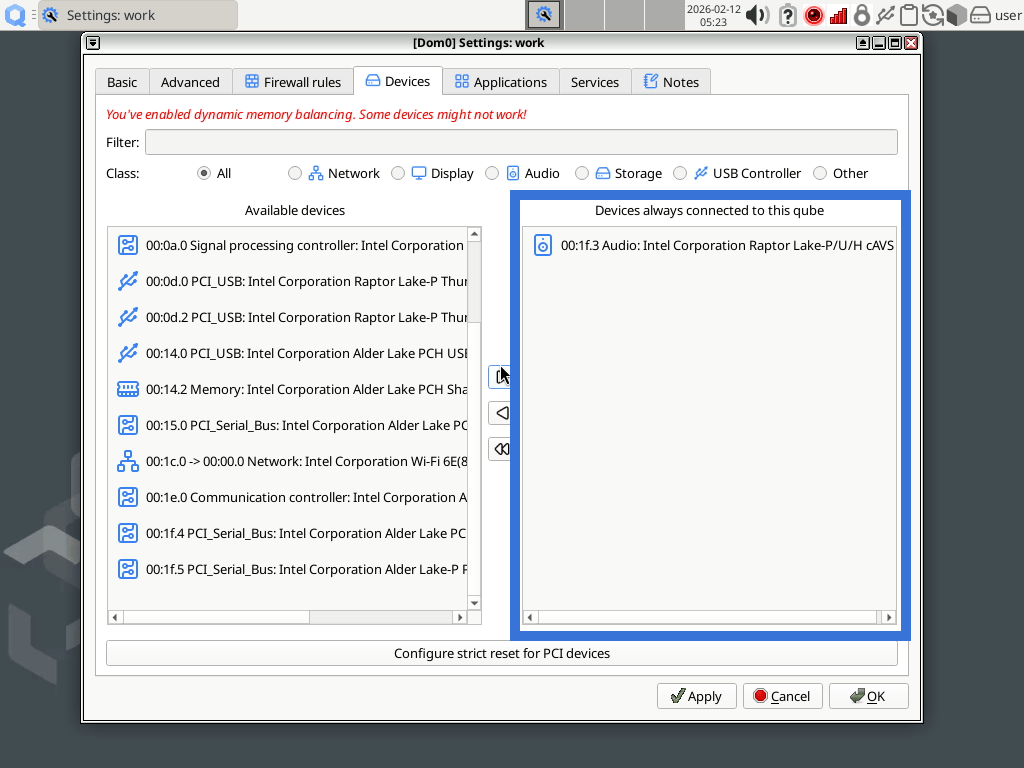
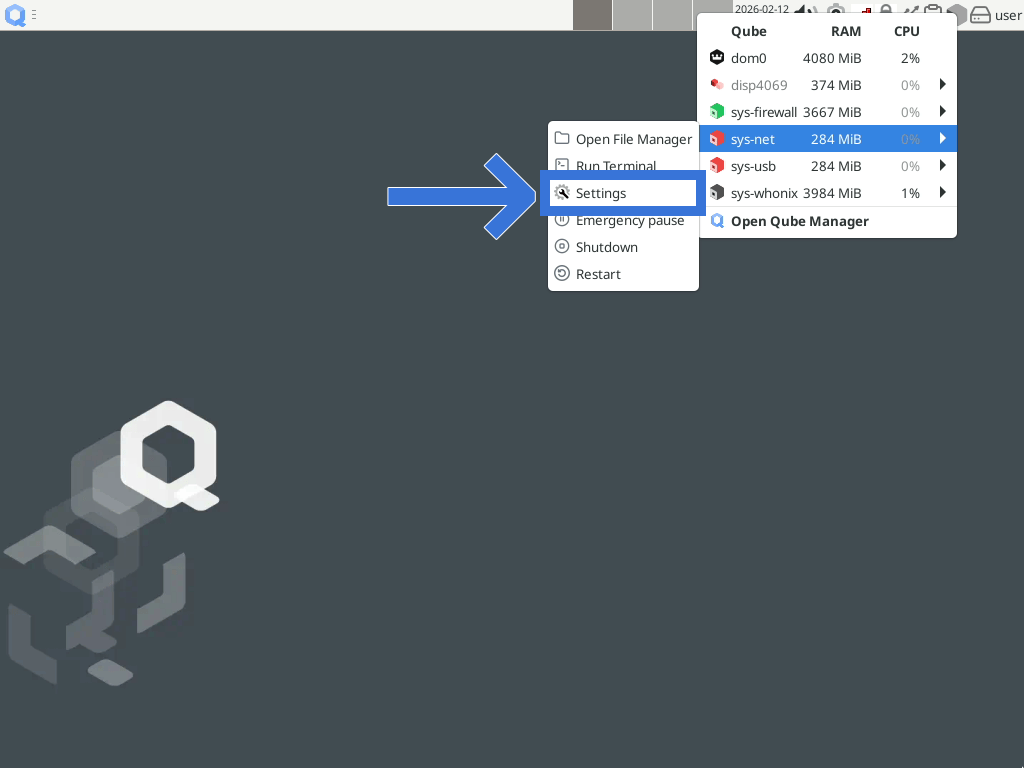
That is the reason why sys-net has direct access to the network hardware and is functional, while our sys-net-tutorial qube is unable to use them. Repeat the earlier operation in the settings of sys-net-tutorial qube to check that no device is always connected to this qube. There is another method to go to the settings of a qube: you can use Qubes Domains widget:
Cheating a little bit …
So, sys-net-tutorial will not be able to use the network devices because you can only attach them to one qube. We will now cheat a little bit to get something more convincing… We will change the “net qube” of sys-net-tutorial from n/a to sys-net. First, make sure that sys-net-tutorial is still running by any of the methods involving Qube Manager or Qube Domains widget. Then, open the settings of this qube with your preferred method.
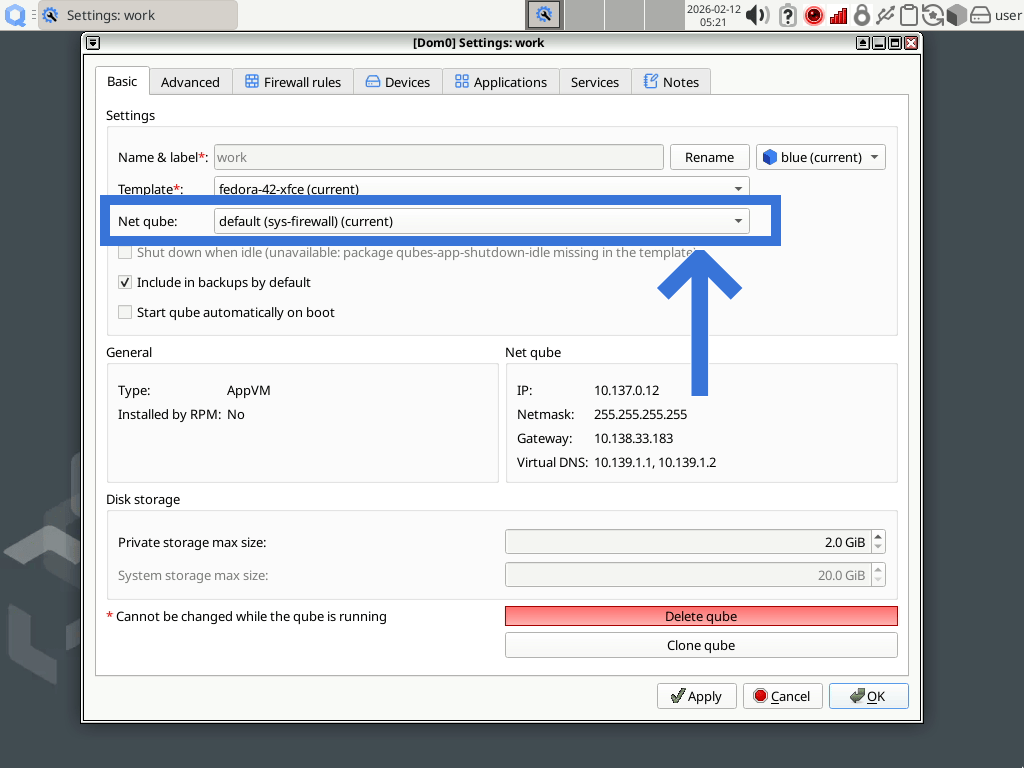
Click the Net qube drop-down menu and select sys-net:
Now, check the green icon of sys-net-tutorial, it should display something new. Clicking on the green icon of sys-net-tutorial in the tray should show you a new Ethernet Network called VM uplink eth0, even if no ethernet is plugged in or no ethernet controller is attached to sys-net-tutorial. Because we changed the net qube of sys-net-tutorial from n/a to sys-net, dom0, as an admin qube allowed sys-net-tutorial to connect to the internet through sys-net. Each qube is like an isolated computer, so dom0 uses a fake ethernet connection to enable sys-net-tutorial to connect like a regular machine.
Why do we need sys-net?
sys-net is a unique qube, because it has access to the networking hardware. Using that hardware requires a lot of code (the drivers, the protocols, etc.), which means poten tial bugs. With a normal operating system, an attacker could use that bug to gain access to the system. In Qubes OS, the sys-net qube acts like a different computer almost isolated from your other qubes, except that it can provide network to them. So even if an attacker manages to get access to sys-net, it won’t be able to get access to the other qubes, especially the ones that don’t have sys-net as their “net qube”.
Some attacks are still possible but they are not different from the ones that someone with access to the Wi-Fi access point might try. In the following tutorials, we will see that another qube, called sys-firewall acts as a trusted qube between your other qubes and sys-net. We will also see that some qubes do not have network access, like dom0.
Cleaning up the qube created during the tutorial
Now that you have completed this first tutorial, you might want too remove the sys-net-tutorial qube.
First, you need to shut down the qube. You should now be familiar with Qubes Domains widget and Qube Manager, you can use any of those programs to shut down sys-net-tutorial. If you need to refresh your memory, take a look at how we started the qube. Shutting it down uses the same menus but a different option or button.
Once the qube is not running anymore, you can delete it using Qube Manager. You can use the same method you used to shut it down. The option or button for Shutdown is grayed out because the qube is not running, so you cannot shut it down. Another option or button is available: Delete qube. You will be prompted to confirm the operation, after clicking on that option or button.
In short
We learned that:
Qubes OS use several isolated compartments called “qubes” at the same time
the connection to the Wi-Fi is similar to the experience in other operating systems but it involves a specific qube called sys-net
a special qube, called dom0 manages all the other qubes, as an admin qube
sys-net has a direct access to the network devices, the other qubes do not
sys-net also provides network access to the other qubes
we learned how to create a qube, to start it, to shut it down and finally, to delete it